Portable iPod Charger
After having to spend far too many bus rides home with an iPod that had a dead battery, I decided to make a portable charger for it. (this will work with other usb devices too)It's different from the popular "Altoids box" designs because it charges the iPod through the USB, not firewire. The advantage is that you use less batteries (5AA instead of 8AA or 2AA and 2 9v) and the voltage remains constant and does not start at 13.8v and then drops down to 10 to 11 volts. (thats not the right way to charge a $400 mp3 player)
Here's how to make it!
Download the schematic.
What you need:
- LM340 5v Voltage regulator
- 0.1uf 10v ceramic disk capacitor
- Female USB jack (I got mine from one of those USB to serial adaptors, Those green micro$oft ones that come attached to usb keyboards and mice)
- On/off toggle switch
- 5AA Batteries (the good kind)
- 91 ohm resistor
- 10 ohm resistor
- 50 000 ohm resistor (*only necessary if not using one of those USB to serial adaptors)
- Enough resistors to make a 61 250 ohm resistor (I used a 10, 20, 220, 10 000 and a 51 000 ohm resistor)
- 1 5mm red l.e.d.
- 1 2N2222 transistor (or equivalent)
- 1 momentary push switch (normally open)
- Misc Parts: Battery holders, project box, heat sink (may not be necessary), etc. (it only cost me $10 to make)
Instructions: Basically follow the schematic.
Notes:
- On those usb to serial adaptors cut off the green plastic case with an exacto knife. Peel off the copper tape that is underneath the green plastic. Remove the round metal thing that goes around the serial connector. Use a multimeter to find out which pins on the serial connector correspond to the ones on the USB connector. (info on usb connectors http://pinouts.ru/data/USB_pinout.shtml)
- If the regulator gets hot you might want to heat sink it. You shouldn't have to but I did just in case.
- The push switch should be left in the circuit because if the l.e.d. stays on all the time it will draw current that is necessary for charging your iPod.
How to use: Just turn it on then plug in your iPod! The l.e.d. is there to determine if the batteries are holding enough of a charge to charge the iPod. If the l.e.d. comes on when you push the button, the batteries are stil good. If it is very dim or doesn't turn on at all you should change the batteries.
If you need help email me at mailto:nikosapi@gmail.com
Here are 2 pictures of my huge prototype. (I made another one that is half the size. Sorry, no pictures yet!)
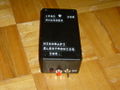
Ipodcharger-1.jpg
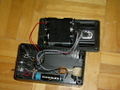
Ipodcharger-2.jpg

